![]()
![]()
![]()
![]()
![]()
![]()
![]()
![]()
![]()
![]()
![]()
![]()
![]()
![]()
![]()
![]()
![]()
The following was graciously supplied by and used with permission from Nick Barone. Thank you Nick.
Okay, here are the pictures I promised as well as some good examples of combining Rail Bed systems products with Garden Metal Models catwalk.
It combined very easily to make a secure and stable roadbed. Right now it is still in the infrastructure phase and in several weeks I’ll start to build the scenery (I am still playing with the mortar, wire mesh screening and dyes to make the right rocks).
My Building Code
Because I live in the New York, I took the industrial strength approach. I assumed the elements would not be kind (As well as the kids, the dog and the landscapers). Here is a photo of my backyard last winter. (There is a railroad under that six foot snowdrift.)
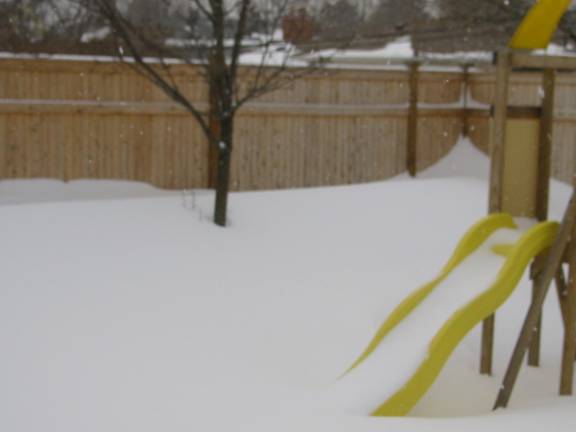
My building rules were simple. It will not move if you:
o Bury it under 24 plus inches of snow;
o Put a leaf blower to it;
o Put a power washer to it (I’ll explain that one later);
o See your child throwing a heavy ball at it or standing on the tracks; or,
o See your 32 pound cairn terrier barreling through the viaducts to chase squirrels.
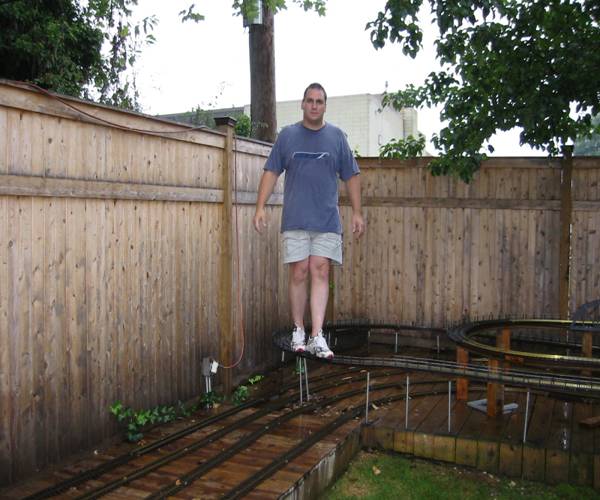
My quality control photo says it all. (Lets just say that’s, err….200+ pounds on top of that rail bed and catwalk.)
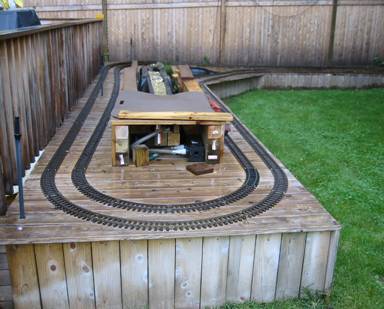
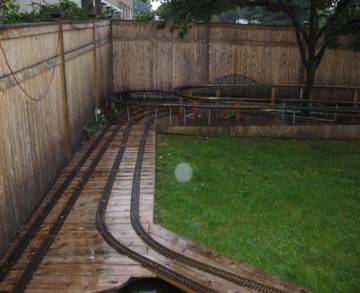
Because my property is sloped and already had pressure treated retaining walls, it was very easy to cedar face it to blend with an existing deck and fence. Those poles protruding on the left are sprinkler heads to water the flower boxes I will integrate into this section. Also built a stream (Sprinklers and rain handle the evaporation problem in summer) and integrated the pond UV filter (See below).
The Material
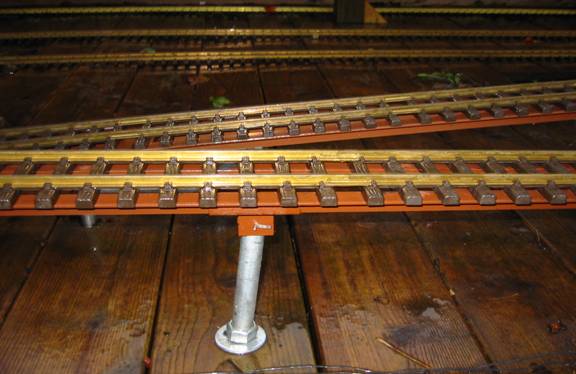
In order to meet my code requirements, I chose Rail Bed systems products to create the foundation for the viaducts. I am partial to steel from growing up in a home with a dad who had a welding business on the side. Why build a family deck foundation out of pressure treated 4X4’s when you can use ¾ inch thick “I” beam steel. Changing out a rotting plank was as easy as unscrewing the bolt holding it down in a tapped hole with a socket wrench.
Because my property has no real natural landscaping to take advantage of other than three Bradford Pear Trees to provide privacy and shade, this made for some drawbacks and opportunities. The stable foundation I created from the cedar planks and frames simply made me go up instead of out. Thus over-unders and bi-levels for a track layout became the norm. In order to reach stable heights above 12 inches I decided the rail bed would sit on 5/8 inch diameter 24” to 36” inch threaded rod drilled through holes made through the cedar planks. The rod depth would negate the frost heave and any side to side motion was offset by washers and bolts placed at the point where the rod extended above the plank. In some places where I couldn’t sink the rod deep enough, I used 4X4 cedar lumber with ¾ pressure treated plywood base for turns held in place with “L” deck tie fasteners.
The drawbacks for anyone who has owned a Bradford pear tree are that these things are messy buggers. Between their little fruit ball and twig droppings, anything under its leaves are destined to become dirty, stained or derailed. (Thus the power washer and leaf blower cures.)
Almost There But……..
The thought of my diesels with sound systems running 24 to 36 inches above the ground climbing on a bare track with 180 degree turns made me a little apprehensive. Because I had so much viaduct running through this layout, it dawned on me that I would have at least three or more engines running at that height and pulling those darn intermodal cars with their airplane wing-like containers. I realized the odds were not in my favor and I had enough experience dealing with train wrecks at ground level. Then I saw your catwalk. “But will it work with the existing rail bed?”
Well it does! Using the supplied fasteners from rail bed systems or 3/8” diameter washers from the local hardware store, I simply laid the track with catwalk on the track bed and used the existing hardware to secure it. (Rail Bed comes with tapped holes to secure the track to the bed).
But What About the Turns?
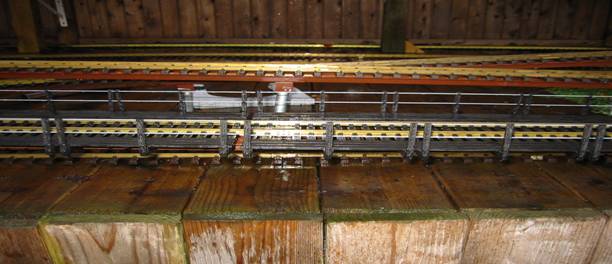
No problem there either. I used the catwalk to make eight and five foot diameter 180 degree turns. A little trimming with a standard garden pruning shear made it easy do. Because of the radius, please note that you need to trim off the catwalk on inside of curve. I used Split Jaw rail and over joiner clamps to true out the curve. (Not good at bending rail just yet). A little tie trimming may be needed as well to accommodate the rail clamp.
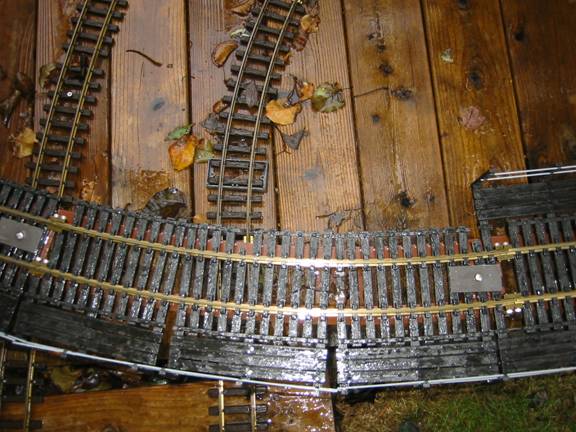
(Eight Foot Section – Top View)
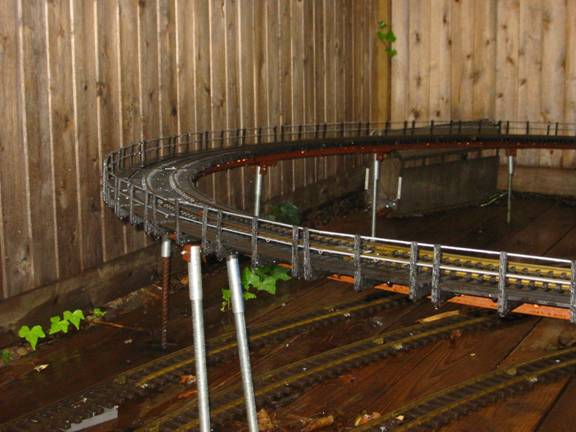
(Eight Foot - 180 Degree Turn – Side view)
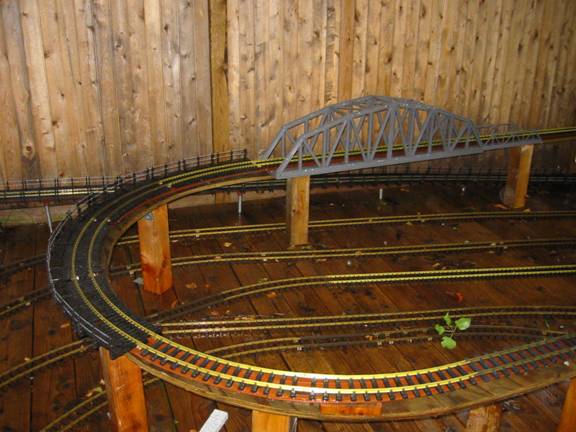
(Five Foot 180 degree Turn - Before and After - Leading up to a 4 foot LGB Bridge) Rail Bed Can Go Through the Bridge and still leave plenty of clearance.
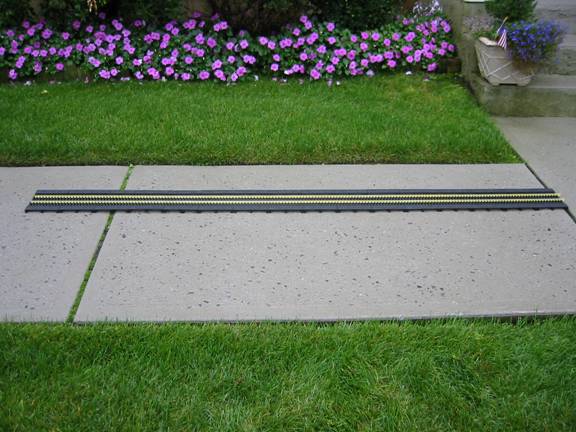
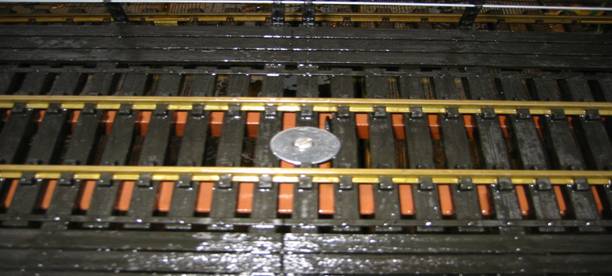
Eight Foot Section Made Using Aristo Brass Rail (Ties Line Up Perfectly with Rail Ends)
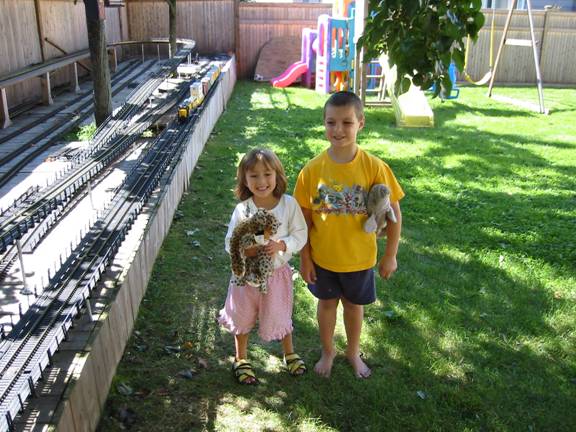
The kids are smiling ‘cause they know I was ready for them!
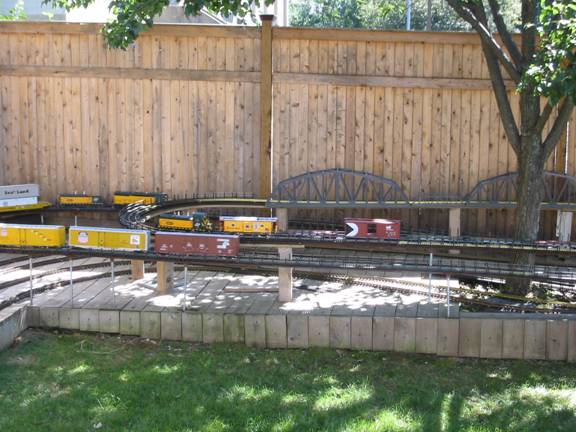
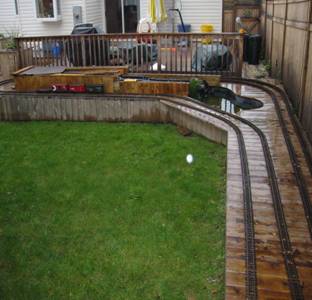
Layout Photo

After building the lines I have decided this will be a city scene. Between the catwalk, viaducts, trestles and bi-levels, it is really starting to look that way. I have also been playing around with the spare catwalks from the inside of turns and I’m finding you can do interesting things with them which I will talk about down the road. Take care for now.
Nick Barone
Long Island, New York